This complete CCTV Troubleshooting Guide helps you quickly identify and fix common issues in your security system. From blank screens and power failures to network errors and recording problems, everything is covered step by step.
You do not always need a technician—most problems can be solved easily with basic checks. Follow this guide to keep your CCTV system running smoothly 24/7 and ensure your home, office, or shop always stays protected.
CCTV Troubleshooting Guide: Fix the CCTV Issues Step-by-Step
Most CCTV problems can be solved easily if you follow a proper step-by-step approach. Instead of guessing, start with basic checks like power and connections, then move to cameras, DVR, and network settings.

This structured method helps you quickly find the exact issue and fix it without confusion or unnecessary technician visits.
1. Basic Rules of CCTV Troubleshooting
Before you start unplugging wires and changing settings, it is highly recommended to follow these golden rules:
- Always check the power first: You would be surprised how many “major system failures” are just a switched-off plug point.
- Isolate the problem: Is the issue happening on one camera, all cameras, or the whole DVR? This helps narrow down the culprit instantly.
- Check physical connections: Dust, moisture, and rats can damage cables. Always physically inspect your cables before changing software settings.
Read our detailed guide on CCTV Maintenance Tools Every Owner and Service Engineer Should Have
2. Monitor and Display Issues
One of the most common complaints is walking up to your security desk and seeing a completely blank screen. Before you panic and assume the entire DVR has crashed, let us look at the display unit.
Problems : The Monitor is Blank During Local DVR Viewing
If you are standing directly in front of your DVR setup and the screen is dark, there are several things to check:
- Power Saving Mode: Sometimes, the monitor has just gone into power-saving mode. The corrective action is very simple: just move the mouse or press any key on the keyboard to wake it up.
- Monitor is Turned Off: Check the physical device. Press the power button directly on the monitor to see if it was accidentally switched off.
- Power Point is Switched Off: Look at the wall socket. If the power point is switched off, check the switch at the power point and turn it on.
- Disconnected Cords: Your power cord might be disconnected, or the video cable is not connected to the DVR. To fix this, first check that the power cord is firmly plugged into both the back of the monitor and the wall power point. Next, check the connection of the video cable (VGA or HDMI) at the back of the DVR and the monitor.
- Faulty Equipment: If you have checked all the above and there is still no display, the DVR might have no power or could be faulty. In this case, check that the DVR power supply actually has power. If the monitor itself is proven to be faulty after testing it with another device, you will need to log a service call.
Problem: Public Viewing Monitor (PVM) is Blank
For retail stores or supermarkets using a Public Viewing Monitor, a blank screen can interrupt customer monitoring.
- Basic Power Issues: Just like a standard monitor, ensure the monitor is not simply turned off, and press the power button on the monitor if necessary. Check if the power point is switched off at the wall.
- Cable Checks: The power cord might be disconnected, or the video cable is not connected to the PVM. Make sure the power cord is firmly plugged into the back of the monitor and the power point, and inspect the video cable connection at the back of the PVM.
- Source Selection: A very common mistake is having the incorrect video source selected. Press the “Source” or “Input” button on the PVM to select the correct AV source.
- Hardware Failure: If you suspect the monitor is faulty after trying these steps, you must log a service call. If the connection has been lost entirely, try to reboot the DVRs that you cannot see cameras from.
3. Power Backup and UPS Problems
In India, voltage fluctuations and sudden power cuts are a reality. A solid UPS (Uninterruptible Power Supply) is the lifeline of your CCTV setup.
Problem: DVR Has No Power
If the DVR box has no glowing LED lights at the front, it is completely dead.
- Basic Switches: Ensure the DVR itself is not turned off; press the power button on the DVR. Check if the power point is switched off or faulty by checking the switch or changing to a different wall socket.
- Cords: The power cord might be disconnected. Verify that the power cord is firmly plugged into the back of the DVR and the wall socket.
- UPS Supply: If the UPS has no power, the DVR will not turn on. You must troubleshoot the UPS (see below).
- Faulty Power Supply: If the DVR power supply (the internal or external adapter) is faulty, you will need to log a service call.
Problem: UPS Has No Power
If your UPS is completely dead:
- Turned Off: The UPS might just be turned off. Press and hold down the power switch on the UPS for about 3 seconds to boot it up.
- Wall Socket: The power point might be switched off or faulty; test this by changing plug points.
- Cords and Outages: The power cord could be disconnected. Check that it is firmly plugged into the back of the UPS and the power point. Keep in mind, if the mains power has failed, a dead UPS after the battery drains is normal during a power outage.
- Faulty Unit: If the UPS is completely faulty, log a service call.
Problem: UPS is Making a Beeping Sound
A continuously beeping UPS is a cry for help.
- Disconnected Power: The power point might be switched off/faulty, or the power cord is disconnected. Check the switch at the power point or try changing points. Also, verify the power cord is firmly plugged into both the UPS and the wall.
- Battery Failure: If the power is perfectly fine but the beeping continues, the internal batteries have likely failed. In this scenario, you must log a service call to get the batteries replaced.
Use our CCTV UPS Backup Time Calculator to estimate the right backup for your system
4. DVR and NVR System Glitches
Sometimes the hardware has power, but the software inside the Digital Video Recorder (DVR) or Network Video Recorder (NVR) acts up.
Problem: The DVR Application is Not Responding or is Frozen
You move the mouse, but the cursor on the screen refuses to budge.
- Input Devices: The mouse or keyboard might be disconnected, or the wrong input on your KVM switch is selected. Check that the mouse and keyboard are firmly connected to the DVR, and ensure the KVM switch is set to the correct input channel.
- System Freeze: The system itself has frozen. To fix this, either press the physical RESET button on the DVR (if it has one) or cycle the power by turning the machine off and on again to restart it.
- Locked Software: Sometimes the software is simply locked for security reasons. You just need to login and enter your correct username and password.
Problem: DVR is On, but Displaying the Windows Background
PC-based DVR systems often run on a Windows architecture. If you suddenly see a standard Windows desktop instead of your camera grid:
- Minimised Software: The DVR software might just be minimised. Move your cursor to the bottom of the screen to bring up the Windows Task Bar, and if you see the DVR program icon, click it to restore the application.
- Software Closed: The DVR software is not running at all. Click the Windows Start button, navigate to the DVR software folder under “All Programs”, and click the DVR program icon to launch it.
5. Camera-Specific Issues (Single and Multiple Cameras)
Losing the video feed is the most critical issue you can face. The way you troubleshoot depends heavily on whether one camera is out, or multiple cameras have died simultaneously.
Problem: No Video on Multiple Cameras
If half of your screen goes black at the same time, the issue is almost always central (power supply or main cables), rather than the cameras themselves.
- Video Connector: The central video connector might be disconnected from the DVR. Check that the main video connector is firmly plugged into the rear of the DVR.
- Power Supply Issues: The camera power supply (SMPS) might be switched off at the power point, or the power cord for the camera power supply is disconnected. Check the switch at the power point and ensure the power cord is firmly plugged into the wall socket.
- Blown Fuses: If you are using a cabinet-style power supply, the main fuse might have blown. Open the cabinet, check the main fuse on the power supply, and replace it if necessary.
- Permissions: You might not have the software permissions to view those specific cameras. If you are a standard user, consult your manager.
- Hardware Failure: If none of the above works, the camera power supply itself is likely faulty, and you should log a service call.
Problem: No Video on One Camera (or not appearing on screen)
If only a single camera is showing a black box or “Video Loss” error, the problem is localized to that specific camera’s cable run or hardware.
- Loose Cables: The camera video cable might be loose at the video connector. Carefully check the BNC connectors on the relevant input channel to ensure they are twisted and locked properly.
- Individual Channel Fuse: For cabinet-style power supplies, the specific camera channel fuse has blown. Open the power supply box, check the individual camera fuse, and replace it if necessary.
- Configuration & Permissions: Just like with multiple cameras, you might lack the permissions to view this camera, so consult your manager. If it is a brand-new camera, it may not be configured correctly on the DVR or within the VMS software. In this case, log a service call for proper configuration.
- Dead Camera: Finally, if everything else is perfect, the camera itself is faulty and requires a technician to log a service call.
If the problem continues, check our complete guide on CCTV camera not working in DVR to fix connection and video loss issues step by step
6. Remote Viewing and Network Problems
In today’s modern world, monitoring your CCTV system from your mobile phone or a remote office is standard practice. But network configurations can be tricky.
Problem: Cannot View Cameras from an Off-Site DVR
You normally view your shop’s cameras from your home, but suddenly the connection fails.
- Network Hardware Down: The network switch or router at the remote location is not working. Ensure the switch/router has power, and cycle the power (restart) to the switch and router.
- DVR Offline: The remote DVR might be turned off, disconnected, or the network settings have been altered. You will need someone on-site to turn on the DVR, connect the LAN cable, or verify the network settings on the machine.
- Firewall & Routing: The port forward is not configured correctly, or the local firewall is blocking the connection. You will need to log into the router to configure port forwarding and add firewall exceptions correctly.
Problem: Multi-Site Issues (e.g., Multi Freedom DVR Site)
If you are managing a large corporate setup and cannot view cameras from other DVRs on the network like you normally do:
- Authentication Errors: The password this specific DVR is using to connect to the remote DVR is incorrect. Update and change the password to the correct one.
- Switch Unresponsive: The local network switch has become un-responsive. Simply cycle the switch power by turning it off and on.
- Internet Failure: You might have no Internet connection, either locally or at the remote site. Try restarting the router at both the remote site and your local site.
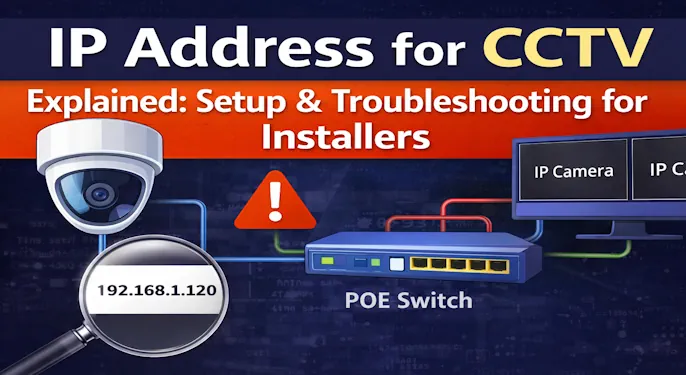
Read also: IP Address for CCTV Explained: Setup & IP Conflict Troubleshooting
7. Advanced Software Issues (eMap, Transcode Services)
For high-end setups that utilize specialized Video Management Software (VMS), unique software-related bugs can appear.
Problem: eMap Not Displayed (Even When Clicking the Button)
If you are using software like Freedom VMS and the interactive electronic map (eMap) refuses to show up:
- Hidden Window: The eMap is likely just hidden behind another application window or has been minimized. Hold down the
<ALT>key and press the<TAB>key until you see the map window, or hover your mouse over the Windows taskbar and click the MFC icon. - No Map Configured: There might simply be no eMaps available for your particular site. You could create eMaps yourself within the software, or talk to your CCTV specialist about having custom maps installed for your premises.
Problem: Transcode Playback or iPhone App Not Displaying Video
If you are using a Freedom Server and your mobile app or transcoded stream is failing to load the video:
- Service Hung: The Transcode Server service may have hung or frozen in the background. To resolve this, click the menu button (which looks like an up arrow icon), select ‘Re-start Transcode Service’, and wait approximately 2 minutes.
- Further Steps: If restarting the transcode service does not fix it, try to Re-Start Freedom entirely, or check the About/Learning section. If it is still not working after all software restarts, restart your router or network switch.
8. CCTV Playback Issues: Live View Works, But Recordings are Missing!
Sometimes your CCTV system shows the live view perfectly fine, but when you try to check the recorded footage for an incident, absolutely nothing appears or the timeline is just missing.
This is a very common problem that gives many people a headache! Usually, it is simply linked to your recording settings, a hard drive issue, or an incorrect date and time configuration.
Common Problems You Might Face:
- The playback screen shows a “No Record Found” message.
- The recording timeline at the bottom is completely empty or missing.
- You are unable to find the footage for a specific date or time.
- The recording is available, but the video time stamp is completely incorrect.
Possible Causes & Quick Solutions:
- Incorrect Date and Time: If your DVR or NVR date and time are wrong, your cameras are still recording, but the footage is getting saved under a completely different timeline! This is exactly why you cannot find it when you search for today’s date. You should fix this immediately to keep your records straight by following our detailed guide: How to Fix CCTV Wrong Date and Time
- Time Mismatch Confusion: Sometimes, users keep searching for footage at the wrong time because there is a huge difference between the DVR system time and the actual real-world time. To avoid this mathematical confusion and find your exact video clip easily, you can use our free tool: CCTV Time Difference Calculator
- Recording is Not Enabled: Someone might have accidentally turned off the recording! Take your mouse, go to DVR Settings → Recording → Schedule, and make sure the recording is enabled for all your cameras. Ensure it is set to ‘Continuous’ (24/7) or ‘Motion’ as per your requirement.
- Hard Drive (HDD) Issue: If your hard disk is not detected or has gone faulty, the system simply cannot store the recordings. Check the HDD status in your storage settings, or refer to our storage troubleshooting section bellow to fix this.
- Overwrite Settings Disabled: When your storage becomes full, the DVR stops recording entirely if the “Overwrite” setting is turned OFF. You must enable the overwrite option so the system can automatically delete the oldest videos and continue recording non-stop.
9. CCTV Camera DVR/NVR Encode Settings Issue: Poor Quality or Improper Recording
Sometimes your CCTV is recording, but video quality is poor or storage fills too fast. This usually happens due to incorrect encode (encoding) settings in your DVR/NVR.
Common Problems You Might Face:
- Blurry or low-quality recordings
- Storage getting full very quickly
- Laggy or choppy playback
- Live view is clear, but playback is poor
Possible Causes & Quick Solutions:
- Wrong Resolution: Set resolution as per camera (like 1080P/4MP) in DVR → Encode settings.
- Low Bitrate: Increase bitrate (e.g., 2048–4096 kbps for 1080P) for better clarity.
- Low FPS: Set frame rate between 15–25 FPS for smooth video.
- Main Stream Not Used: Ensure recording is set to Main Stream, not Sub Stream.
- Compression Setting: Enable H.265/H.265+ for better quality with less storage.
- Storage Planning Issue: High settings = fast storage full. Balance quality and storage properly.
For a complete step-by-step explanation with proper recommended settings, you can check this detailed guide on CCTV Encode Settings.
10. Storage and Hard Drive Errors
Many CCTV recording problems are not actually caused by a faulty hard drive, but by poor storage planning. If your HDD capacity is too low, old footage gets automatically overwritten, and you may not even notice it until you need the recording. To avoid this situation, it is always better to calculate your storage requirement in advance using the CCTV HDD Calculator.
At the same time, hard drive errors are often the silent killer of CCTV systems. Everything may look perfectly fine in live view, but when an incident happens and you check playback, you find that nothing was recorded.
Common Problems:
- DVR is beeping loudly and continuously (often an HDD error alert).
- The playback screen shows “No Record Found” for recent dates.
- The screen displays a “No HDD” watermark on the live view.
Corrective Actions:
- Check the SATA Connections: Power down the DVR, open the casing, and ensure the red/black SATA data cable and the power cable attached to the hard disk drive are firmly pushed in.
- Format the Drive: Sometimes a hard drive gets corrupted due to sudden power loss. Navigate to your DVR’s main menu, look for “Storage” or “HDD Manager,” select the hard drive, and click “Format” or “Initialize.” (Warning: This will erase all old footage).
- Replace the HDD: Standard desktop hard drives are not built to spin 24/7. Always use a Surveillance-grade hard drive. If your drive is clicking physically or showing “Bad Sectors” in the software, it is time to replace it.
Read also: The Difference Between Normal HDDs and Surveillance HDDs
11. CCTV Audio Issues: No Sound or Poor Audio Quality
While getting a clear video feed is the main priority, hearing the audio can be just as crucial during an incident. It is incredibly frustrating when you can clearly see someone talking on your screen, but you cannot hear a single word!
Before we start fixing things, it is important to confirm if your specific camera model actually has a built-in microphone. Many standard CCTV cameras only record video. If you are unsure about your equipment, you should first read our detailed guide: Can CCTV Camera Record Voice? If you are absolutely sure your camera supports audio but it is still not working, let us troubleshoot the problem.
Common Problems You Might Face:
- There is no sound on the live view or during playback.
- The audio is buzzing, crackling, or the volume is completely inaudible.
- The sound works perfectly on your mobile phone app, but not on your DVR monitor (or vice versa).
Possible Causes & Quick Solutions:
- Audio Settings are Disabled in the DVR: This is the most common mistake! By default, many DVRs are set to record ‘Video Only’ to save hard drive space. Take your mouse, go to your DVR Main Menu → Camera / Encode Settings. Look for the “Stream Type” drop-down menu and change it from Video Stream to Video & Audio. Make sure you apply this setting for both the Main Stream (for local recording) and Sub Stream (for mobile viewing).
- The Monitor Cable Does Not Support Sound: If you have connected your DVR to a monitor or TV using a blue VGA cable, you will never hear any sound! VGA cables only carry video signals. To hear the audio directly from your TV speakers, you must connect the DVR using an HDMI cable.
- Mobile App is Muted: If you are viewing the cameras on your smartphone and cannot hear anything, check the live view screen carefully. There is usually a small speaker icon at the bottom of the video player that is muted by default. Simply tap the speaker icon to unmute the live feed. Also, ensure your phone’s media volume is turned up!
- External Microphone Power Failure: If you are using an older analog system with an external add-on microphone (usually a small golf-ball-sized mic placed near the camera), remember that this microphone needs its own power supply. Check if the mic’s 12V power adapter is plugged in and working, and ensure the RCA audio cable is securely plugged into the “Audio In” port on the back of the DVR.
- Environmental Noise and Placement: If the audio is extremely noisy or crackling, the microphone might be placed too close to a running AC compressor, a ceiling fan, or a busy road. High winds can also distort the audio. Try to relocate the microphone or use a camera with advanced digital noise reduction.
By enabling the right settings and checking your cables, you can easily get clear, crisp audio to match your security footage!
12. Preventive Maintenance Tips
Troubleshooting is great, but prevention is always better than cure. Here are a few essential tips to ensure your setup runs smoothly year-round:
- Dust Your DVR: The cooling fans in your DVR suck in a lot of dust. Once a month, use a soft brush or compressed air to clean the vents. Overheating is the number one cause of motherboard and HDD failure.
- Check Playback Weekly: Make it a habit to check the recorded footage every Monday morning. Just view 5 minutes of footage from the previous night to confirm the hard drive is actively recording.
- Secure Outdoor Connections: Use waterproof junction boxes for all outdoor cameras. Wrapping a BNC connector in electrical tape is not enough to stop monsoon rainwater from seeping into the copper wire and ruining the camera board.
- Invest in a Good SMPS: Do not use cheap local power adapters. Invest in a heavy-duty, branded SMPS (Switched-Mode Power Supply) with proper grounding. This protects your cameras from voltage spikes.
Frequently Asked Questions (FAQs)
Q: Why does my CCTV camera show rolling lines and a flickering image?
A: Flickering is usually caused by a poor power supply. Your SMPS might be failing, or it isn’t providing the required 12V output. It can also happen if your CCTV cables are laid directly next to high-voltage electrical wires, causing electromagnetic interference. Try replacing the power supply or routing the cables away from electrical mains.
Q: My night vision is terrible. The camera shows a blurry white haze at night. Why?
A: This is known as IR reflection. The infrared (IR) LEDs on the camera are turning on, but the light is bouncing off something directly back into the lens. This is usually caused by a dirty dome glass, dust, spider webs, or installing the camera too close to a white wall. Clean the glass with a microfiber cloth and adjust the camera angle.
Q: Do CCTV cameras need the internet to record?
A: No. Your cameras will continue to transmit video to the DVR, and the DVR will record to the internal hard drive perfectly fine without any internet connection. The internet is only required if you want to view the cameras remotely on your smartphone or PC.
Q: How do I know if my camera’s power adapter is dead without a multimeter?
A: The easiest way is to cover the front lens of the camera entirely with your hands to simulate darkness. You should hear a faint “click” sound (the IR cut filter moving) and see the small red LEDs glow. If nothing happens, the camera is likely receiving zero power.
Conclusion
CCTV troubleshooting is mostly about following a clear step-by-step process—starting from power, then cables, and finally system settings. Most issues are simple and can be fixed without technical help if you check things properly.
By using this guide, you can quickly identify problems, save money on unnecessary service visits, and keep your security system running smoothly 24/7. Regular maintenance and timely checks will ensure your CCTV system always stays reliable when you need it the most.
(Disclaimer: Always prioritize safety. If you are dealing with exposed electrical mains or high-voltage wiring, switch off the main breaker and consult a licensed electrician.)

")